The next step in our Datsun Engine build series is to set the piston ring gap for each of the cylinder bores. Gapping the piston rings is important to the performance and reliability of the engine. Piston rings expand as the engine comes up to temperature. Too big a gap and the ring won’t expand enough causing too much blow-by of the combustion gases in the crankcase reducing the power and torque of the motor. Too small a gap and the ring will over expand too much potentially damaging the cylinder bore or the ring landing.
Tools and Equipment:
Piston Rings
Manufacturer Instructions
Spare Piston
Feeler Gauges
Bench Vise
File
Powder Free Nitrile Gloves
Denatured Alcohol
Coffee Filters
Compressed Air and Spray Nozzle
Piston Ring Function
The piston rings come in a set with a top compression ring, second compression ring and an oil scraper sandwiched between two oil rings. The job of the top compression ring seals is to seal in the combustion gases as they push the piston down the cylinder bore. Another function of the top ring is to transfer heat from the combustion and built up in the piston to the outer cylinder walls that are surrounded by the engine coolant that eventually flows through to the radiator. Setting the correct top ring gap is crucial to engine performance.
The second ring acts an additional method to contain the compression gases and also transfer heat to the cylinder walls and eventually the engine coolant. Typically the second ring has a slightly larger gap than the top ring when used in performance applications. This ensures that any combustion gases that make it past the top ring don’t get stuck and build up underneath the top ring forcing the top ring up and making the seal worse. This is sometimes referred to as ring flutter. Sometimes the second ring also has a scraping fixture or Napier to remove excess oil from the cylinder wall.
The oil rings hold the oil scrapper in place. The oil scrapper works to ensure that the correct amount of oil is on the cylinder wall. The scrapper ring spreads oil evenly across the cylinder wall and then removes any excess oil.
Piston rings come in various shapes, materials and surface treatments depending on the application.
Measuring Piston Ring Gap
If you are just doing a rebuild most OEM piston rings come preset from the manufacturer but it is always a good idea to double check the settings and make sure they are within specification.
Performance ring sets can come with pre-determined values but often they are undersized so that the engine builder can set the specific gap they want based on the performance application.
Piston and piston ring manufacturers provide specification for their ring gaps dependent on the performance application. These are normally specified as a gap times by the cylinder bore diameter.
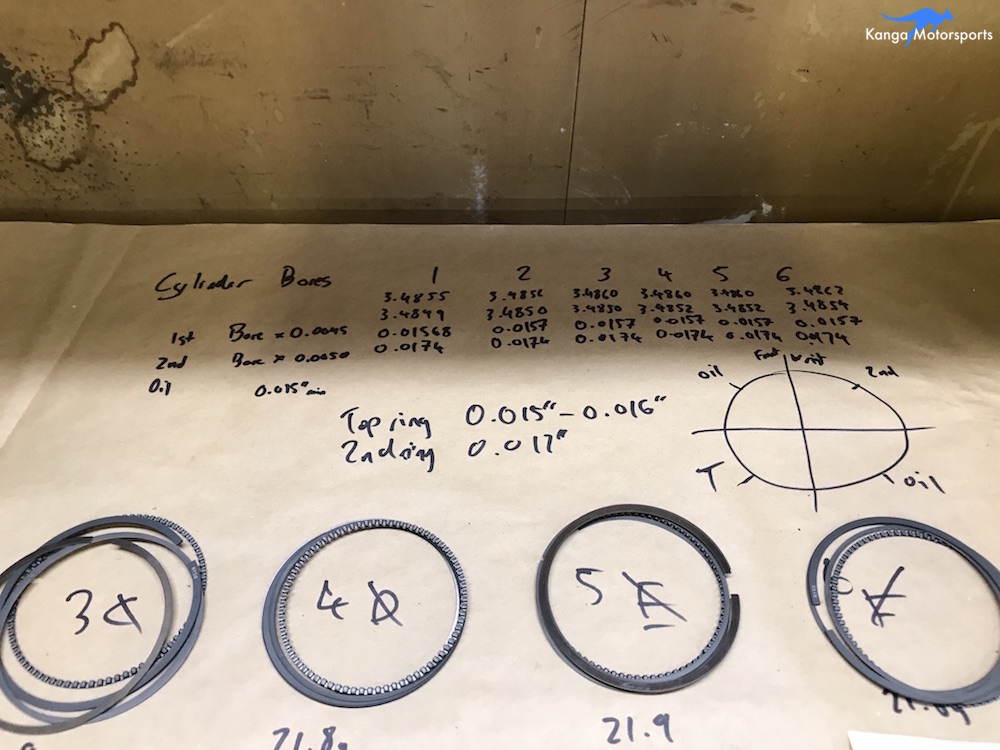
For our high performance street applications these were our values:
Top Ring = Bore x 0.0045 = 3.4855 x 0.0045 = 0.0157 inches
Second Ring = Bore x 0.0050 = 3.4855 x 0.0050 = 0.0174 inches
Oil Ring > 0.015 inches
Given that we can only measure to 0.001 inches with our feeler gauges we rounded up or down the values to:
Top Ring = 0.016 inches
Second Ring = 0.017 inches*
Oil Ring > 0.015 inches
*See the note later in the article about the bigger second ring gap.
We assigned each ring set to a cylinder bore and determined the ring gap for the top and second rings based on the manufacturers recommendation and our application.
Note also the cylinder bore image which tells us where in the cylinder bore to place the ring gap. There are lots of debates on the correct placement of the ring gaps. You want to make sure they do not all line in the cylinder bore as this can increase the amount of blow-by of combustion gases getting past the piston into the lower crankcase. We just evenly space the ring gaps around the piston not in alignment with the crankshaft or piston thrust direction. The reality is that the piston rings probably spin around in the bore at high rpm so they will end up wherever they please. Don’t stress about it too much.
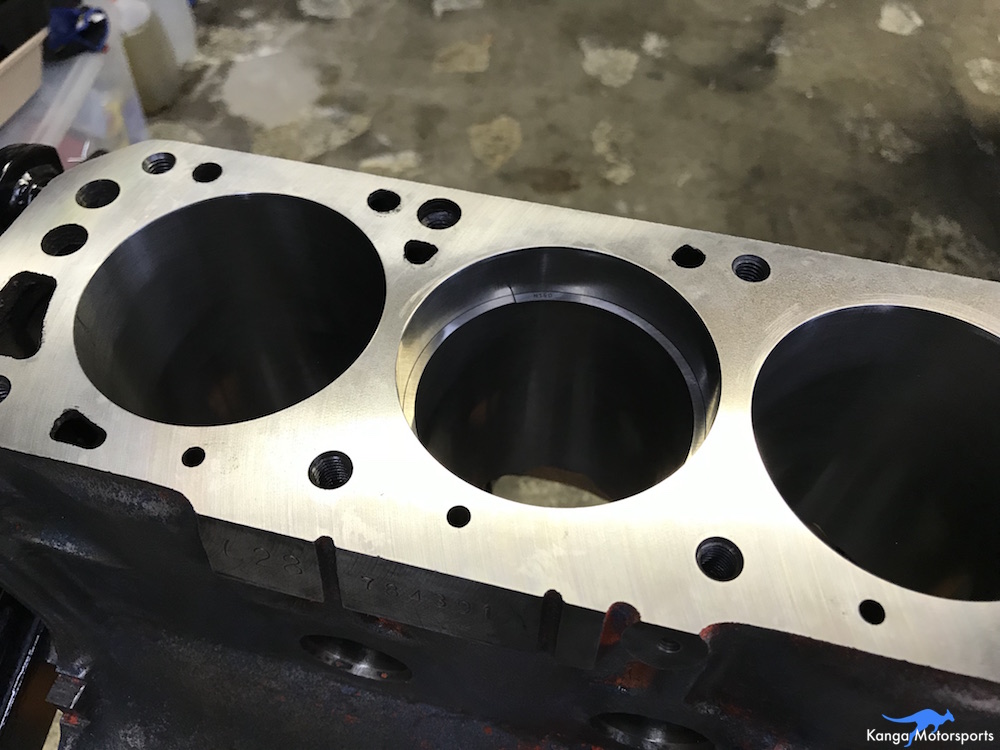
Before inserting the piston rings in the cylinder bores you want to make sure the bores are very clean. We use gloves, denatured alcohol with coffee filters as wipes and clean moisture free compressed air. Be very careful with denatured alcohol it is poisonous and you don’t want to get it on you. Make sure you keep the lid on and that your gloves are free of tears. Do not mess around with this stuff. Alternatively you can use your favorite degreaser or other cleaning chemical. Wipe down the bore and the blow out any lint from the coffee filters with dry clean compressed air.
The piston rings each have an orientation due to a specific outer finish, shape and/or taper. If you install the rings upside down they might not seal correctly. Depending on your manufacture the up direction is normally indicated by a marking either part number or dot. On our set of rings the N150 indicates up.
An easy way to fit the piston ring into the bores, is to squeeze it in backwards using the bore itself to compress the ring. Make sure to align the piston ring with the correct orientation in the cylinder bore.
When you first put the ring in the bore it might not be level or flat in the bore.
You can flatten and level the piston ring in the bore by using the top of a piston. Here you can see how we align a know level on the piston ring skirt with engine block deck. Using the piston as a reference you can get repeat measurements of the piston ring in the same orientation and position in the cylinder bore.
Remove the piston and the ring will now be at a known height and square in the bore. If the ring is not level in the bore it can affect your measurements especially the repeatability after filing.
Use a set of feeler gauges to check the current ring gap. Select a size and try it in the gap. If it goes in too easy the feeler gauge might be too small move up to the next size. The gap size you have is when the gauge can just slide through with minimal resistance. Always check the next size up to make sure it doesn’t fit. Make sure you are measuring the entire width of the piston ring all the way to the outside edge of the cylinder bore.
Record the value of the feeler and check it against the desired value you calculated using the manufacturers instructions or engine builders advice. Here the gap was too small so we will needed to increase the gap slightly.
Sometimes when testing with the feeler gauges you can snag one end of the ring and put it out slightly out of alignment. Use the back side of the piston to return the ring to flat and level in the cylinder bore.
Filing the Piston Ring Gap
To increase the piston ring gap you will need to carefully remove material from the very edge of the piston ring.
There are special tools you can buy for gapping piston rings with spinning grinding wheels and even gauges to record how much material was removed. If you are not building a lot of engines you can just use a simple hand file.
Clamp the straight file in a bench vise. This will make it easier to get a straight smooth edge on the ring than if you are doing it free hand.
Always file the rings from the outside to inside. You do not want to damage the outer edge of the piston by going the other way. Going inside to outside you can chip the outer edge of coat or specifically shipped rings. You can also potentially leave burr on outside edge that can scratch the cylinder bores.
When filing the piston rings you want to make sure it is done flat and level. Go slow and keep checking the ring as you file to make sure it is parallel.
After filing the rings you want to be sure to remove any burrs by using some fine sand paper or emery cloth. Be very careful not chamfer the edges because it will change the overall ring gap and cause blow-by.
Reinsert the ring into the correct cylinder bore to recheck the measurements. We find it more accurate to match each ring to the intended cylinder bore than doing them all in one bore. Realistically it probably doesn’t matter as there are such small tolerance differences between the various cylinders.
Recheck using the feeler gauges. When the gauge just runs through smoothly with very little resistance you have it just right.
Keep rechecking the ring each time taking only a little material off each time. You want to sneak up on the exact gap so that you do not overshoot it by taking off too much material.
Here you can see a gapped ring with good fitment and a nice flat edge.
Continue measuring and adjusting the gap of each piston ring, Make sure to check the in ring in their corresponding cylinder bores.
When measuring and checking our second rings we found them larger than the specified 0.017 inches, they were 0.023 inches. In speaking with Dave at Rebello racing they run higher second ring gaps to better prevent ring flutter and avoid poor sealing of the top ring. We made sure to double check and gap the rings to the new recommendation.
The oil rings only needed to be checked to ensure they were greater than 0.015 inches. The oil scraper ring does not need to be gapped.
Once you have all the rings gapped to the correct settings for their assigned cylinder bore, weigh the set and record the value. This information will be used when balancing the piston assemblies.
Want more Datsun 240z articles and tech tips? Sign up for our Kanga Motorsports Newsletter


